Step-by-step instructions for getting started with Amazon Attribution.
CREATE YOUR FIRST CAMPAIGN
When creating your campaign, you can choose from two creation methods. We’ll explore step-by-step instructions for creating each type of campaign on the following pages:
Create a manual campaign to start inputting campaign details and generating tags.
Use the bulk upload option to create multiple tags at once for Google search and Facebook and Instagram ad campaigns. You can measure up to 100,000 Google search keywords or 8,500 Facebook or Instagram ads by uploading a single file.
MANUAL CAMPAIGN
Step 1: Start your campaign and choose a creation method
Sign in to the advertising console and expand the global navigation to find “Measurement and Reporting” and select “Amazon Attribution”. Then, go to the campaign manager and select “Create campaign”.
Once you’re on the “New campaign” page, under “Creation method” choose the “Create manually” option.
Step 2: Choose your campaign settings and add products
Add a campaign name, which will only be seen by you in the campaign manager. It’s helpful to name your campaign based on the type of products you’ll be advertising or your campaign goal, such as promoting your bestsellers, supporting a new product launch, highlighting seasonal deals, or building awareness for your brand on Amazon.
In the products pane, you’ll be able to view all the products you’re currently selling on Amazon. Only products that are in stock and include photos and prices are eligible for measurement. Choose products that align with the objectives of your campaign, like those we mentioned above.
Segment your campaigns based on product groupings by including one or more products featured in your ad creative and any size and color variations. Including multiple products in a campaign can help you learn which products shoppers purchased after clicking your off-Amazon ad.
If you don’t see all of your products or see products that don’t belong to your brand, you can manage your brand-to-product mapping and request changes to help you accurately measure the effectiveness of your ad campaigns. Go to “Access and Settings” and click “Brands.” After selecting the brand you want to manage, you’ll have the option to add or remove products.
Step 3: Create ad groups and generate attribution tags
Create one ad group per strategy, tactic, or creative. For example, you can create an ad group to measure an organic post on social media and another to measure a paid social ad. Each ad group generates a unique Amazon Attribution tag that will allow you to measure conversions for the products you previously selected.
Then add the following:
Ad group name: Create an ad group name based on where and how this specific tag will be implemented.
Publisher: Select the publisher that corresponds to your ad or post. If the publisher isn’t listed, select “New” and enter the publisher’s name.
Channel: Choose the channel that corresponds with the campaign you’re measuring.
Click-through URL: Enter the Amazon destination that you want to drive customers to once they click your ad—either a product detail page or a Store page. This is the destination that your attribution tag will drive to. If your goal is to drive sales for a specific product, consider including a link to the product’s detail page to help shoppers explore the product in detail. If you want to drive consideration across a number of products, consider linking to your Store so shoppers can browse your full catalog.
To add more ad groups under the same campaign, click “Add new ad group.”
Once you’ve created all your ad groups, click “Create.” You’ve successfully created your campaign. The confirmation screen shows a tag generated for each ad group. You can download all tags in a CSV file or copy each tag individually.
Step 4: Apply your attribution tags
To complete your measurement setup, apply the attribution tags to your campaigns through the corresponding off-Amazon campaign manager. For example, if you’re running an ad on a social media site, visit the ad manager within that site.
Copy and paste the specific attribution tag into the destination URL field in place of the Amazon ASIN or Store URL. Do this for each individual tactic, including social posts, ads, links, and buttons. You can also provide the tag directly to the publisher if your media is site-served.
BULK UPLOAD
Once you’re on the “New campaign” page, under “Creation method” choose the “Upload a file to create in bulk” option.
Step 2: Download your bulk file template
Once in the “Bulk upload settings” section, under “Publisher”, select Google Ads or Facebook/Instagram depending on your campaign type.
Download the bulk file template.
Go to Instructions tab of the downloaded template and follow the steps to create a report from the publisher that includes the required columns listed in the template.
Step 3: Complete your bulk file template
Google search campaign
Fill out the required columns in the Keywords tab (columns A through H) of your bulk file template by downloading the necessary information from the Google Ads Report Editor:
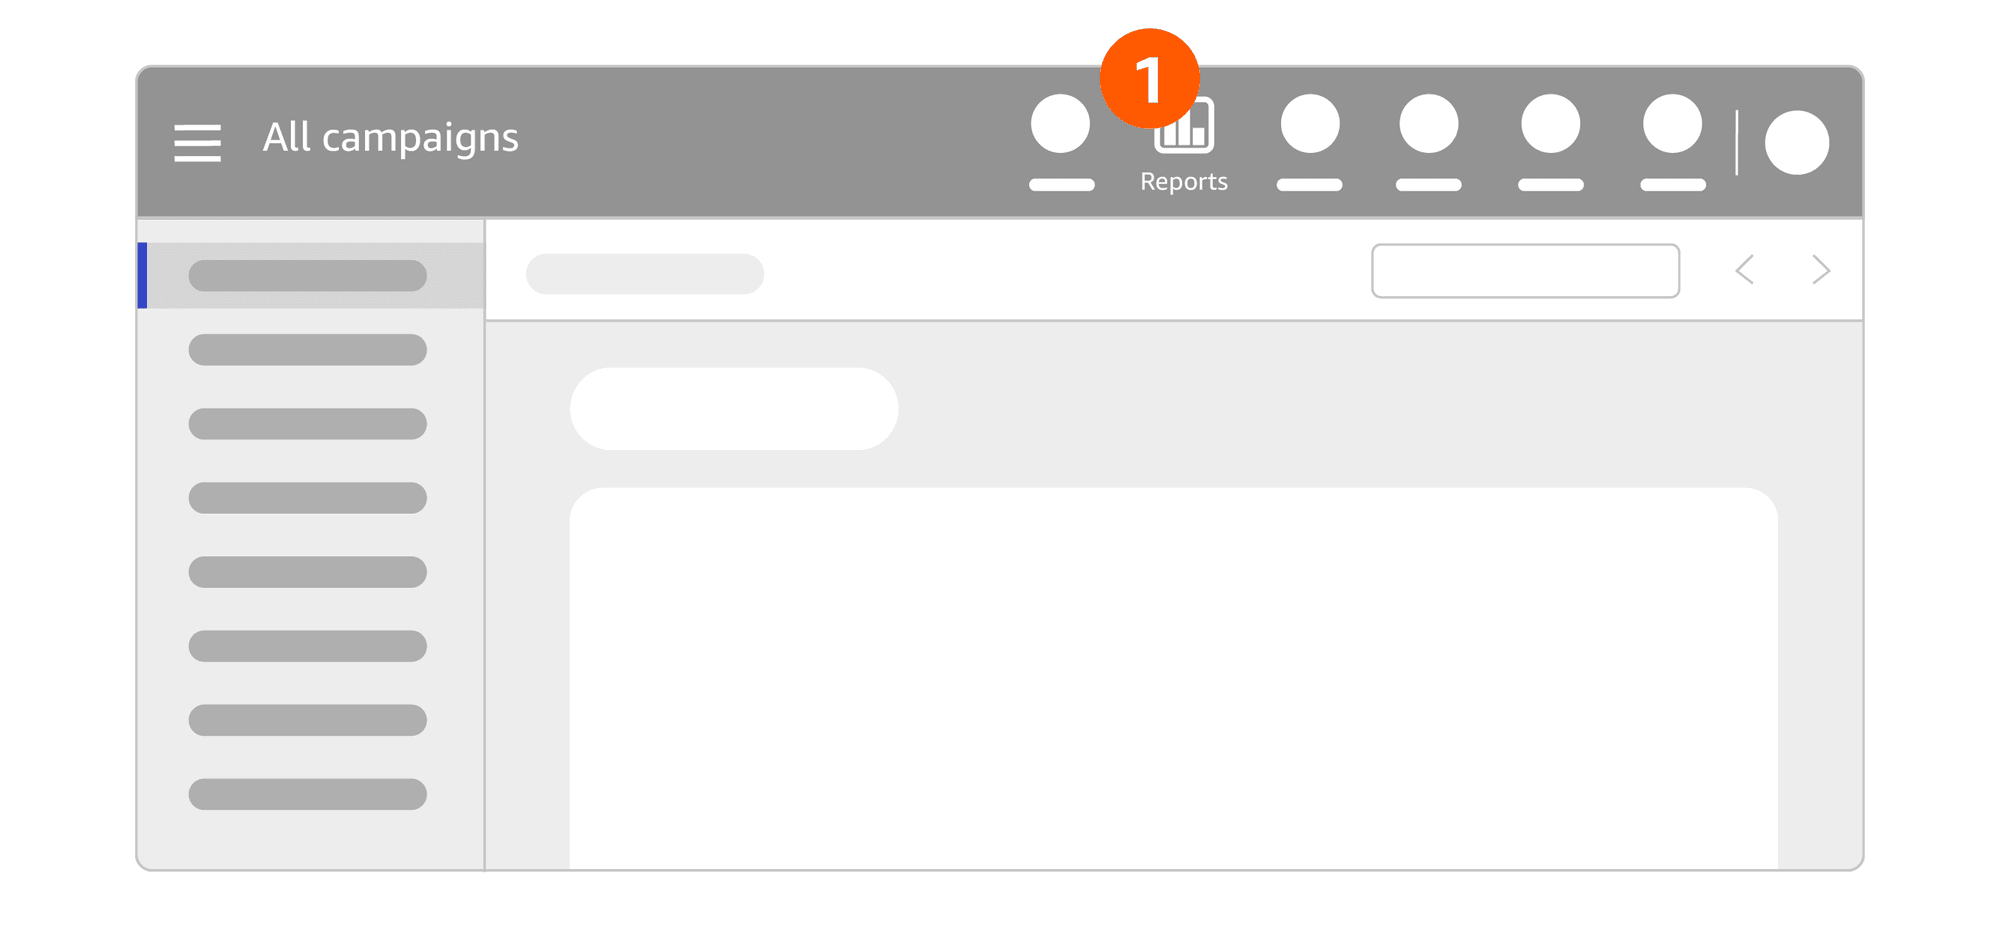
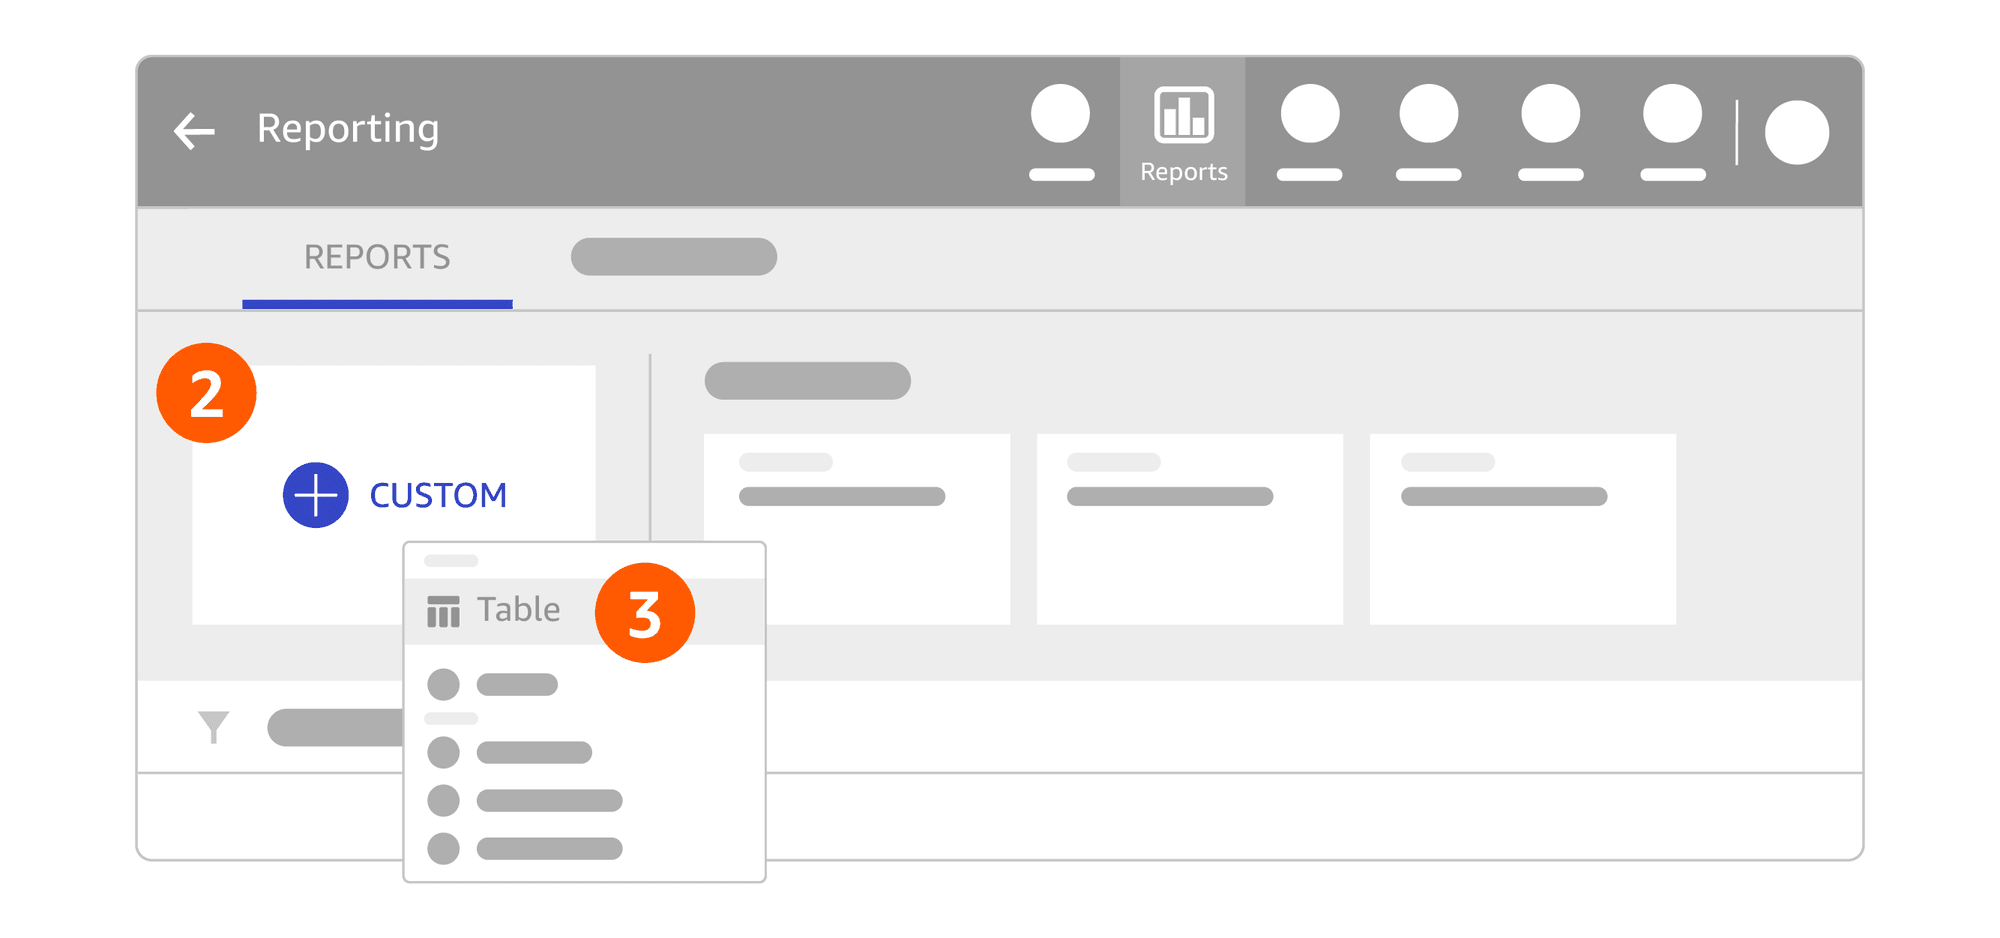
1. On the "All campaigns" page, select “Reports”. 2. Select “Custom” under “Reports”. 3. Select “Table”. 4. In the “Search metrics and dimensions” field, choose the necessary fields for the bulk file template. 5. Download the report and copy the contents into the Amazon Attribution bulk file template. Save it as an XLS/XLSX file.
Facebook or Instagram ad campaign
Fill out the required columns in the Ads tab (columns A through J) of your bulk file template by downloading the necessary information from the Facebook Ads Manager:
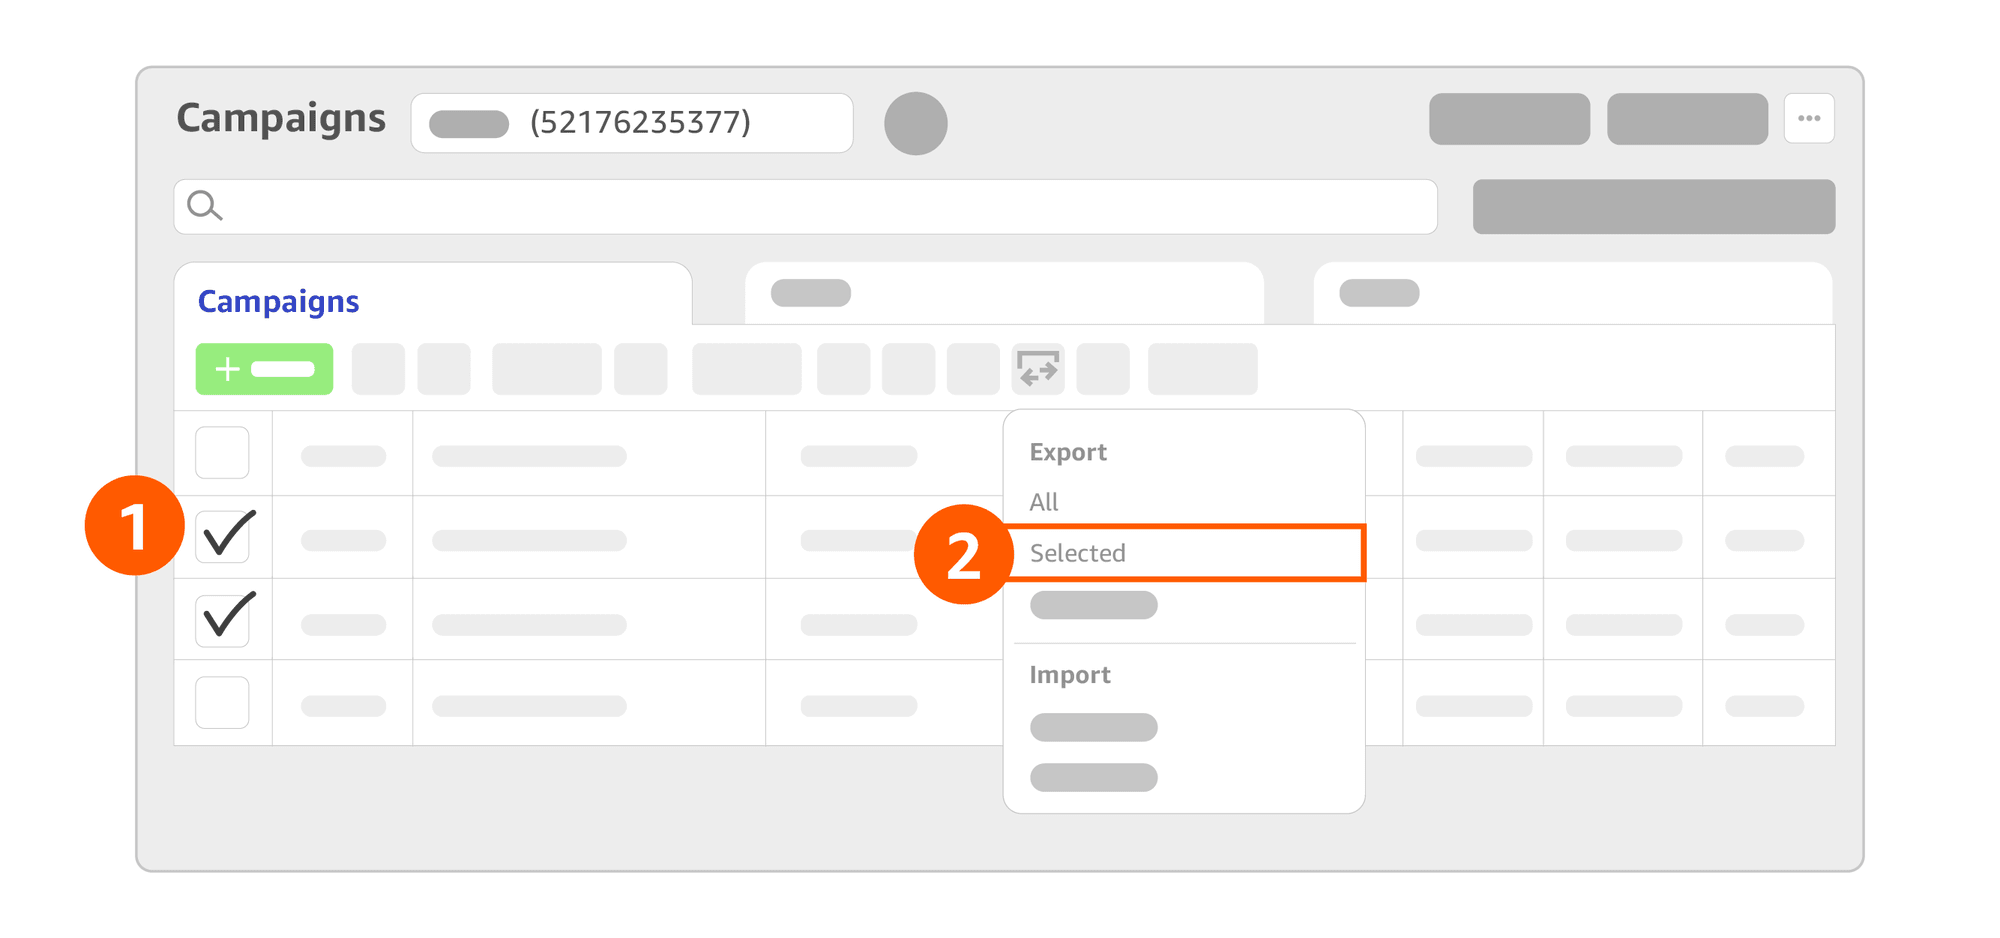
1. On the “Campaigns” page, check the campaign(s) that you want to measure. 2. Click the “Export/Import” icon and choose “Selected” under the “Export” section. If you want to measure all of your Facebook campaigns, select “All” under “Export”. 3. Copy the contents into the Amazon Attribution bulk file template and save it as an XLS/XLSX file.
Step 4: Complete your file upload
Back in the advertising console under “Bulk upload settings”, upload your completed bulk file template. The file will be immediately reviewed for errors. If you receive error messaging, correct any errors that were flagged and reselect the file to be uploaded.
Step 5: Add products to your campaign
Step 6: Finish campaign creation
Select “Create” to begin the tag creation process. This process will take roughly 10 minutes and you’ll be notified via email once complete. You can also check the progress on the “Bulk created campaigns” page. Once complete, the progress will change to "Completed".
Step 7: Implement your attribution tags
Once the tag creation is complete, you’ll see an attribution tags file. Download the resulting bulk sheet with the necessary Amazon Attribution campaign information and save it locally for future reference.
To complete your measurement setup, apply the attribution tags to your campaigns through the corresponding off-Amazon campaign manager. For example, if you’re running an ad on a social media site, visit the ad manager within that site:
If you would like to create more tags for the same campaign in the future, just upload a new file. Even if your file contains ads you previously uploaded, any preexisting tags will be reused and new tags will be created as needed, so the processed file will contain a mix of old and new tags.
Review your reporting and performance
Once you apply your tags and launch your campaigns, the advertising console will display reporting—most likely only clicks to begin with. Wait 1-2 days to review and validate your reporting. Keep in mind that you may see a 10-20% discrepancy when comparing Amazon Attribution metrics to publisher or ad server traffic data, which could be due to factors such as a difference in click-counting methodology.
Once you’ve validated that your tags are reporting correctly, you can check the performance of your campaigns in the Amazon Attribution campaign manager. We’ll explore reporting more in the next chapter.
Remember to enroll in the Brand Referral Bonus program to start earning a bonus for product sales driven by non-Amazon marketing campaigns and measured by Amazon Attribution.
Troubleshooting tips
If you’re seeing a discrepancy greater than 20% between your Amazon Attribution metrics and the publisher or ad server traffic data, following our troubleshooting tips for common issues below:
You see more clicks in Amazon Attribution than in your publisher or ad server reporting: Check that the date range you selected is the same for Amazon Attribution and your publisher reporting. Then make sure the attribution tag isn’t being shared across other creatives, URLs, or event trackers.
You see fewer clicks in Amazon Attribution than in your publisher or ad server reporting: Check that the date range you selected is the same for Amazon Attribution and your publisher reporting. Ensure you’re only comparing publisher reporting for ads that include Amazon Attribution.
You don’t see any clicks in Amazon Attribution: Make sure you correctly implemented your attribution tags, which we covered in Step 4 for manual campaigns and Step 7 for bulk upload.
You don’t see conversions or sales in Amazon Attribution: Check that the product ASINs have been assigned to your campaigns. Keep in mind that the default columns in our console show conversions attributed to the products associated to your campaign. Sometimes when there are no purchases or detail page views for products, ads can still contribute to overall brand conversions, which will be itemized under “Total metrics.”
You see discrepancies between Amazon Attribution and Stores insights: Amazon Attribution and Stores insights use different attribution methodology, which likely accounts for any discrepancies.